Parasidian (talk | contribs) No edit summary Tag: rte-source |
Tags: Visual edit apiedit |
||
| Line 23: | Line 23: | ||
===Introduction and Design=== |
===Introduction and Design=== |
||
{{Quote|Once you're suited up, take a moment to adjust to hydraulic ambulation. It's a little different than you might expect. Joint stabilizers will keep your aim steady. All you've got to do is get the enemy in your sights and let the triple-barrel chain gun do the rest. Point, shoot, and ruin a grub's day. Hell yes. <br> "Making use of the Silverback's deployable cover systems can mean the difference between life and death for your squadmates. Once engaged, the rig settles into a lower stance and raises rear plate shields to provide cover for your crew while you take care of business. With rockets. Damn, I love rockets.<br> "The Silverback's blast shielding has been further reinforced to soak up more fire. It can take a lot of heat, but like the civilian model, when the alarms start blaring, it's time to get the hell out.<br> "Watch your back. Oh, and have fun.|Corporal [[Kathryn Farrell]], [[COG Engineering Corps]]<ref>Gears of War 3 Collectible - Silverback Manual</ref>}} |
{{Quote|Once you're suited up, take a moment to adjust to hydraulic ambulation. It's a little different than you might expect. Joint stabilizers will keep your aim steady. All you've got to do is get the enemy in your sights and let the triple-barrel chain gun do the rest. Point, shoot, and ruin a grub's day. Hell yes. <br> "Making use of the Silverback's deployable cover systems can mean the difference between life and death for your squadmates. Once engaged, the rig settles into a lower stance and raises rear plate shields to provide cover for your crew while you take care of business. With rockets. Damn, I love rockets.<br> "The Silverback's blast shielding has been further reinforced to soak up more fire. It can take a lot of heat, but like the civilian model, when the alarms start blaring, it's time to get the hell out.<br> "Watch your back. Oh, and have fun.|Corporal [[Kathryn Farrell]], [[COG Engineering Corps]]<ref>Gears of War 3 Collectible - Silverback Manual</ref>}} |
||
| − | The Silverback was originally a [[Mechanical Loader|Loader]] mech suit, but it was later militarized to become a light, one-manned exo-suit for the COG Army. The Silverback is equipped with a heavy rocket launcher, which is only usable in its "shield" mode, on one arm and a stripped-down version of the [[Mulcher]] on the other. The "shield" mode is a secondary mode designed to provide extra cover and fire support. It has the ability to spread its leg armor out, effectively creating cover for other [[COG]] soldiers to hide behind, but at the cost of movement. Whilst COG soldiers are in the exo-suit, the Silverback is able to roadie run and curb stomp enemies. When not in use, Silverbacks are stored in special service bays. They are positioned on a small hub, with a clamp that hangs from the roof that holds it in position. When in these bays, Silverbacks also have a compact "transport" or "service" mode where the main body collapses on to the legs, and the arms fold up and swing behind the body. While in these bays, they are also being charged and linked to a diagnostics computer in the bay via the clamp.<ref>Observations of Silverbacks in operation</ref> |
+ | The Silverback was originally a [[Mechanical Loader|Loader]] mech suit, but it was later militarized to become a light, one-manned exo-suit for the COG Army. The Silverback is equipped with a heavy rocket launcher, (That is considered a boomshot, and you can earn boomshot condecorations with the rocket launcher.) which is only usable in its "shield" mode, on one arm and a stripped-down version of the [[Mulcher]] on the other. The "shield" mode is a secondary mode designed to provide extra cover and fire support. It has the ability to spread its leg armor out, effectively creating cover for other [[COG]] soldiers to hide behind, but at the cost of movement. Whilst COG soldiers are in the exo-suit, the Silverback is able to roadie run and curb stomp enemies. When not in use, Silverbacks are stored in special service bays. They are positioned on a small hub, with a clamp that hangs from the roof that holds it in position. When in these bays, Silverbacks also have a compact "transport" or "service" mode where the main body collapses on to the legs, and the arms fold up and swing behind the body. While in these bays, they are also being charged and linked to a diagnostics computer in the bay via the clamp.<ref>Observations of Silverbacks in operation</ref> |
===Locust War=== |
===Locust War=== |
||
Revision as of 19:35, 5 February 2016
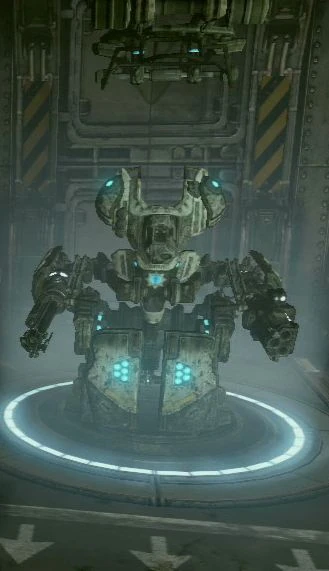
The Silverback is a small, one-manned, military exo-suit used by the Coalition of Ordered Governments Army. It is armed with a stripped-down version of a Mulcher and a heavy rocket launcher for weapons, and can deploy stationary shield walls at either side of the legs for other Gears to take cover behind.
History
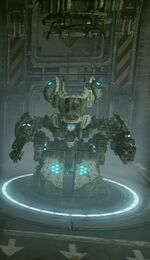
A Silverback in its service bay.
Introduction and Design
- "Once you're suited up, take a moment to adjust to hydraulic ambulation. It's a little different than you might expect. Joint stabilizers will keep your aim steady. All you've got to do is get the enemy in your sights and let the triple-barrel chain gun do the rest. Point, shoot, and ruin a grub's day. Hell yes.
"Making use of the Silverback's deployable cover systems can mean the difference between life and death for your squadmates. Once engaged, the rig settles into a lower stance and raises rear plate shields to provide cover for your crew while you take care of business. With rockets. Damn, I love rockets.
"The Silverback's blast shielding has been further reinforced to soak up more fire. It can take a lot of heat, but like the civilian model, when the alarms start blaring, it's time to get the hell out.
"Watch your back. Oh, and have fun." - —Corporal Kathryn Farrell, COG Engineering Corps[1]
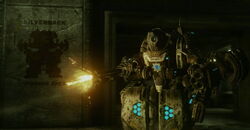
The Silverback was originally a Loader mech suit, but it was later militarized to become a light, one-manned exo-suit for the COG Army. The Silverback is equipped with a heavy rocket launcher, (That is considered a boomshot, and you can earn boomshot condecorations with the rocket launcher.) which is only usable in its "shield" mode, on one arm and a stripped-down version of the Mulcher on the other. The "shield" mode is a secondary mode designed to provide extra cover and fire support. It has the ability to spread its leg armor out, effectively creating cover for other COG soldiers to hide behind, but at the cost of movement. Whilst COG soldiers are in the exo-suit, the Silverback is able to roadie run and curb stomp enemies. When not in use, Silverbacks are stored in special service bays. They are positioned on a small hub, with a clamp that hangs from the roof that holds it in position. When in these bays, Silverbacks also have a compact "transport" or "service" mode where the main body collapses on to the legs, and the arms fold up and swing behind the body. While in these bays, they are also being charged and linked to a diagnostics computer in the bay via the clamp.[2]
Locust War
Destruction of Halvo Bay
Retaking Onyx Point
- "Hey, a Silverback! I've heard about these things."
- —Lt. Damon Baird upon seeing a Silverback
As Kilo moved deeper in to the Onyx Point fort to launch a Lightmass Missile to save Halvo Bay, a Silverback was located in the vehicle yard. Augustus Cole then used the mech to clear a path through the vehicle yard, just before an artillery strike hit the fort, allowing Kilo to carry on with their mission.
Evacuation of Ilima
Roughly ten years after Emergence Day, General RAAM was faced with Silverbacks during his attack on Ilima to position Seeders so they could ink the skies for the Kryllstorm. When finding the position for the last one, two Gears in Silverbacks were dispatched to stop him and his raiding party. They were quickly killed by the Kryll under RAAM's control by squeezing through the gaps in the armor plating. The Silverback mechs were then destroyed to stop them being used again.[3]
Lambent Pandemic
Defending the CNV Sovereign
- "We're gonna need a bigger cattle prod. Let's use the two Silverbacks in the maintenance bay!"
- —Marcus Fenix, deciding how to dislodge the Leviathan
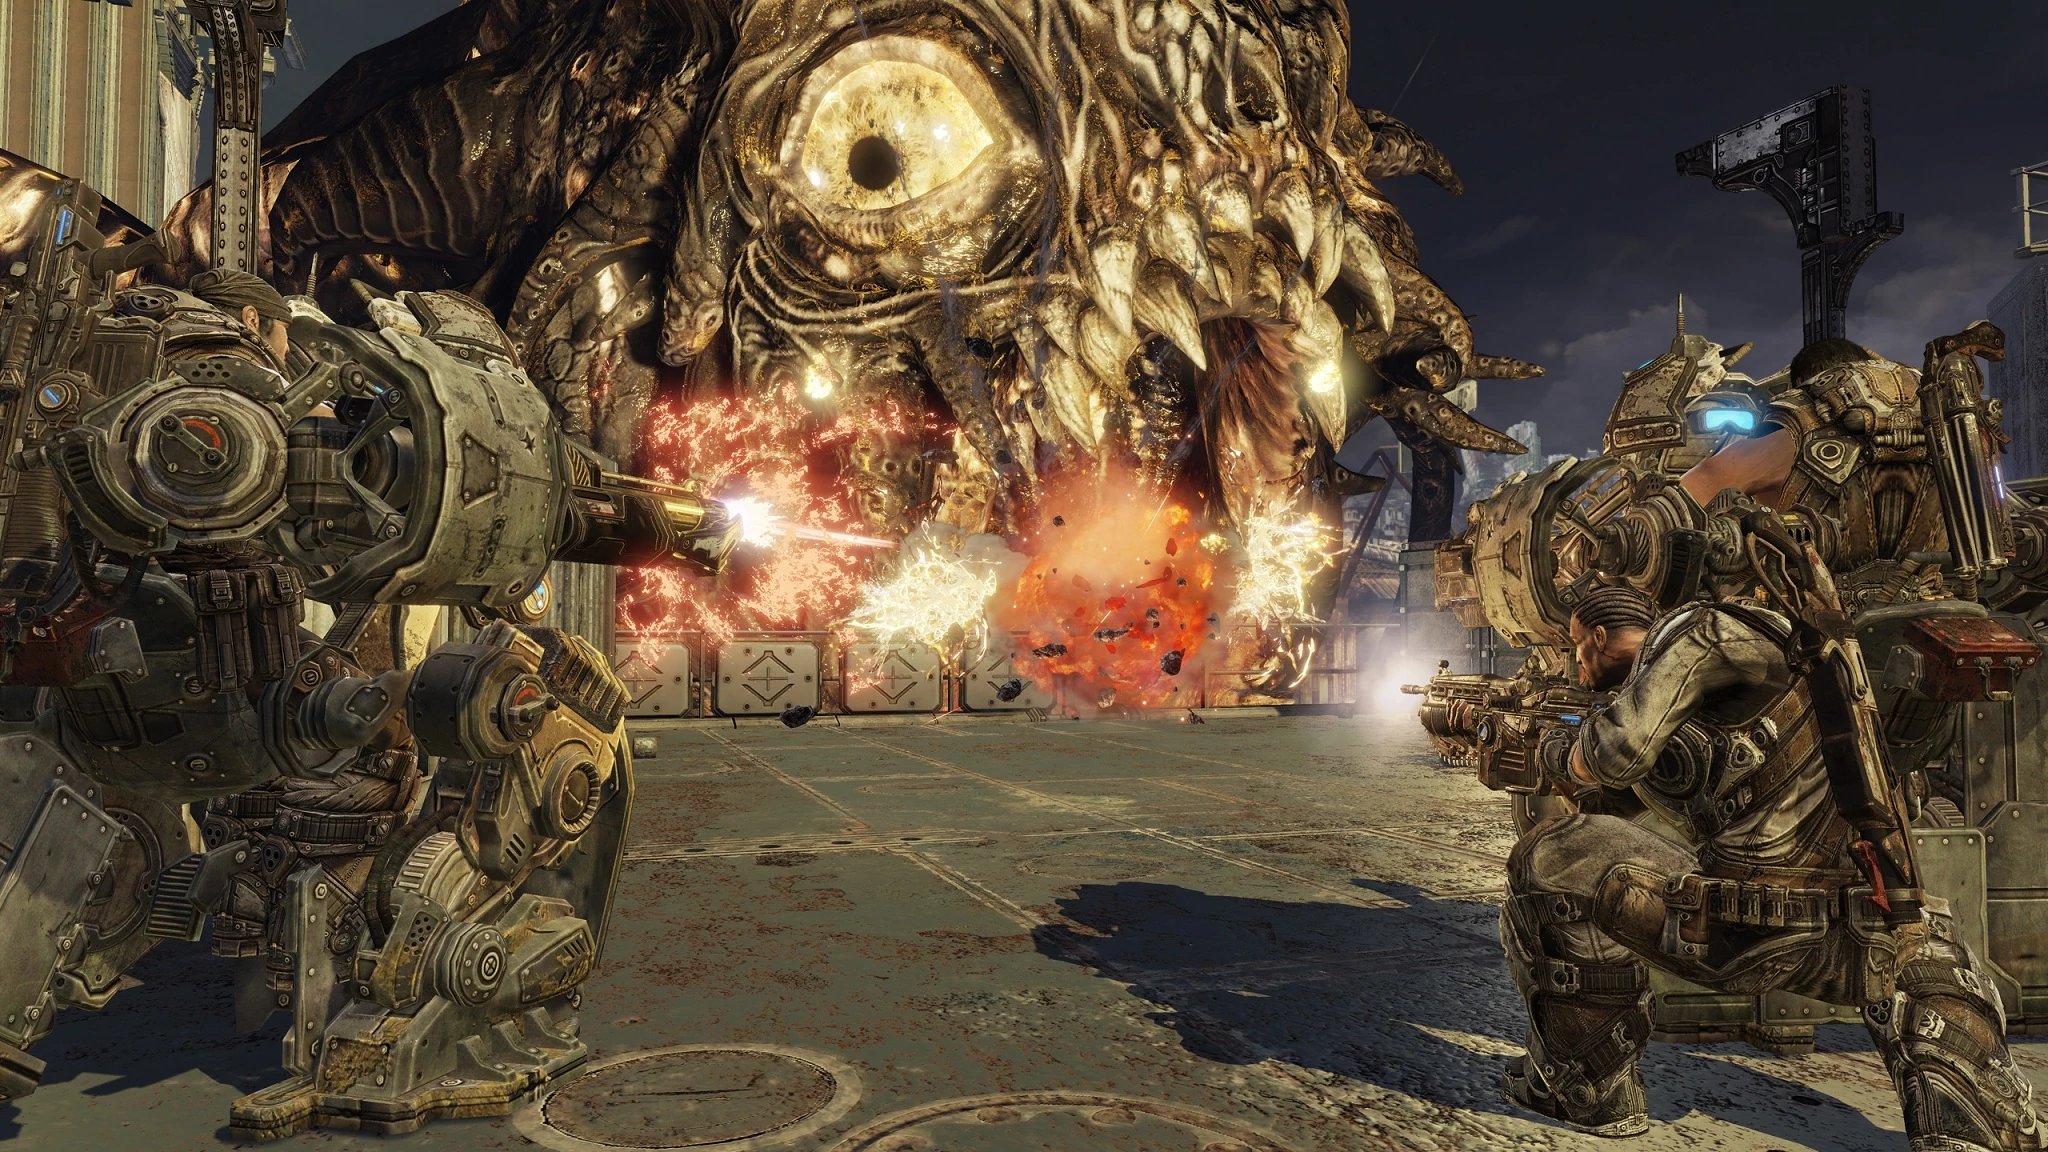

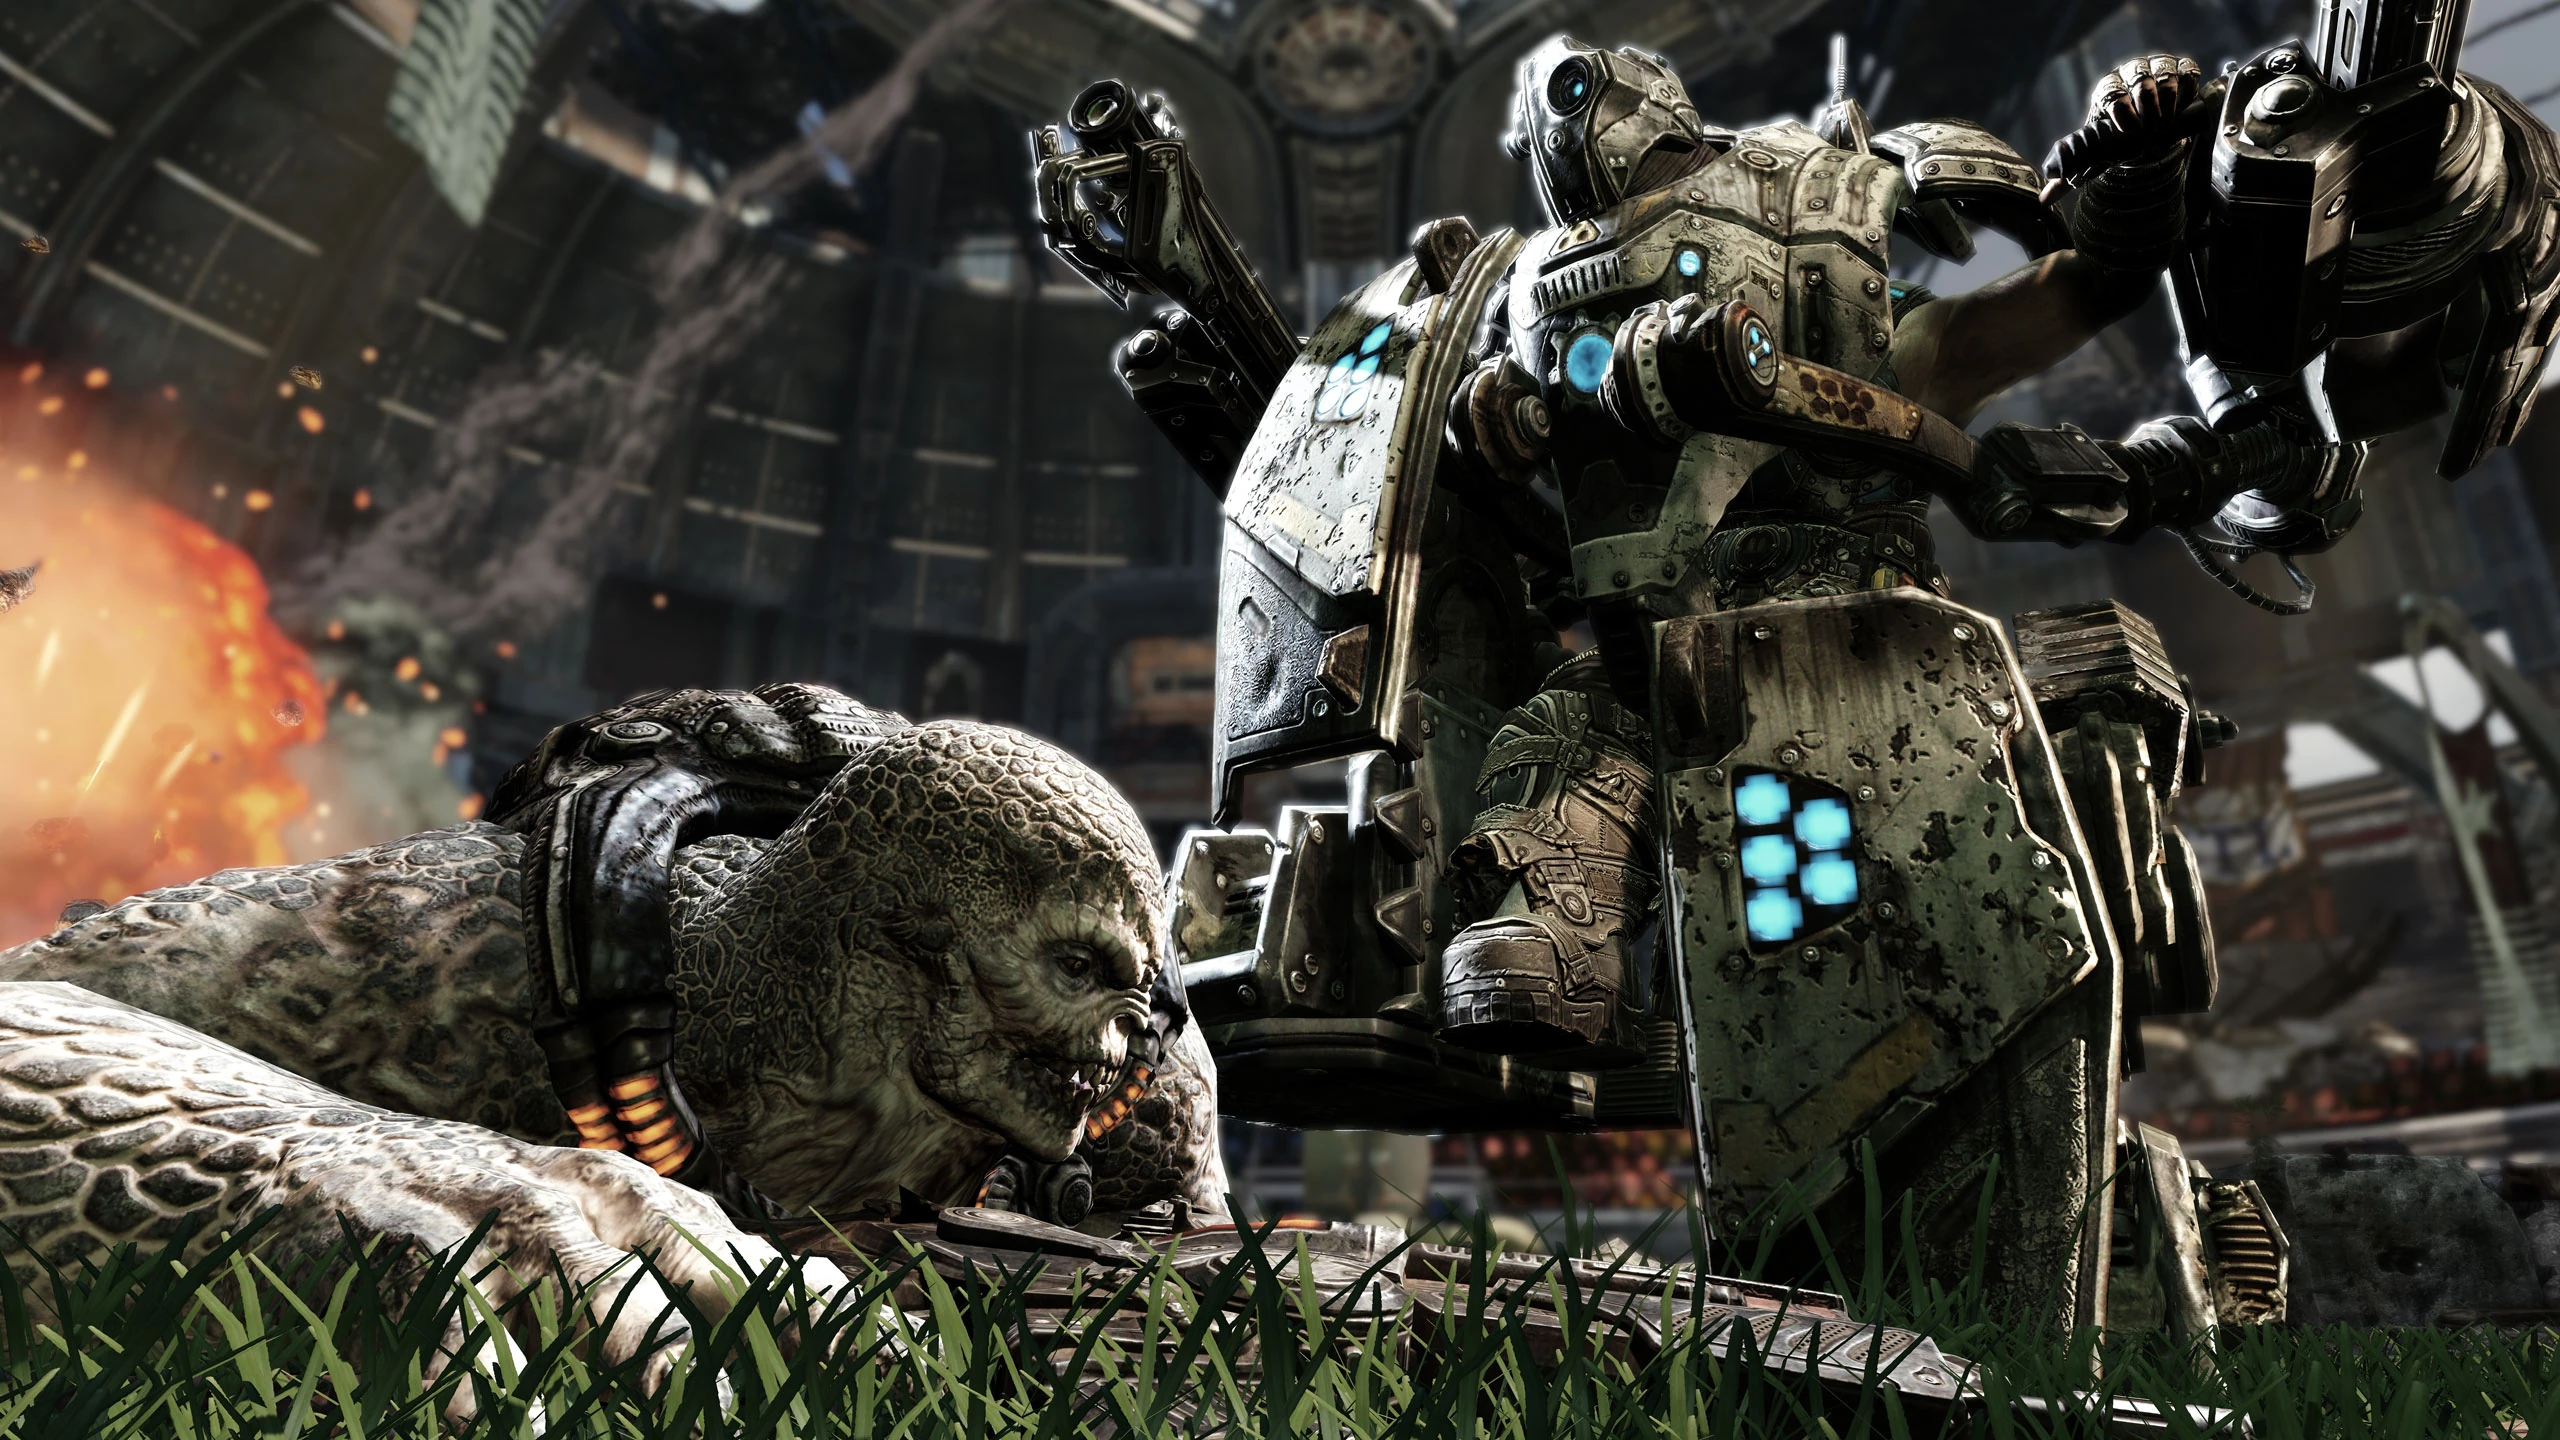
Delta Squad fights off a Lambent Leviathan on the CNV Sovereign with two Silverbacks.
The CNV Sovereign had several Silverbacks in storage, two of which were maintained by Cpl. Kathryn Farrell. During Delta-One's defense of the CNV Sovereign from a massive Lambent attack, Sgt. Marcus Fenix and Cpl. Dominic Santiago located two Silverbacks in the maintenance bay and used them to drive a huge Lambent Leviathan to the front of the ship, while Lt. Anya Stroud and Cpl. Jace Stratton held off the Lambent Drones and Polyps. They managed to move it under the Centennial Bridge with the firepower from the Silverbacks, allowing Cpl. Damon Baird to kill it by dropping Tickers on top of it.[4]
Battle of Endeavor Shipyard
- "Yeah! Now that's what I'm talkin' 'bout, baby!"
- —Jace Stratton, upon finding a Silverback
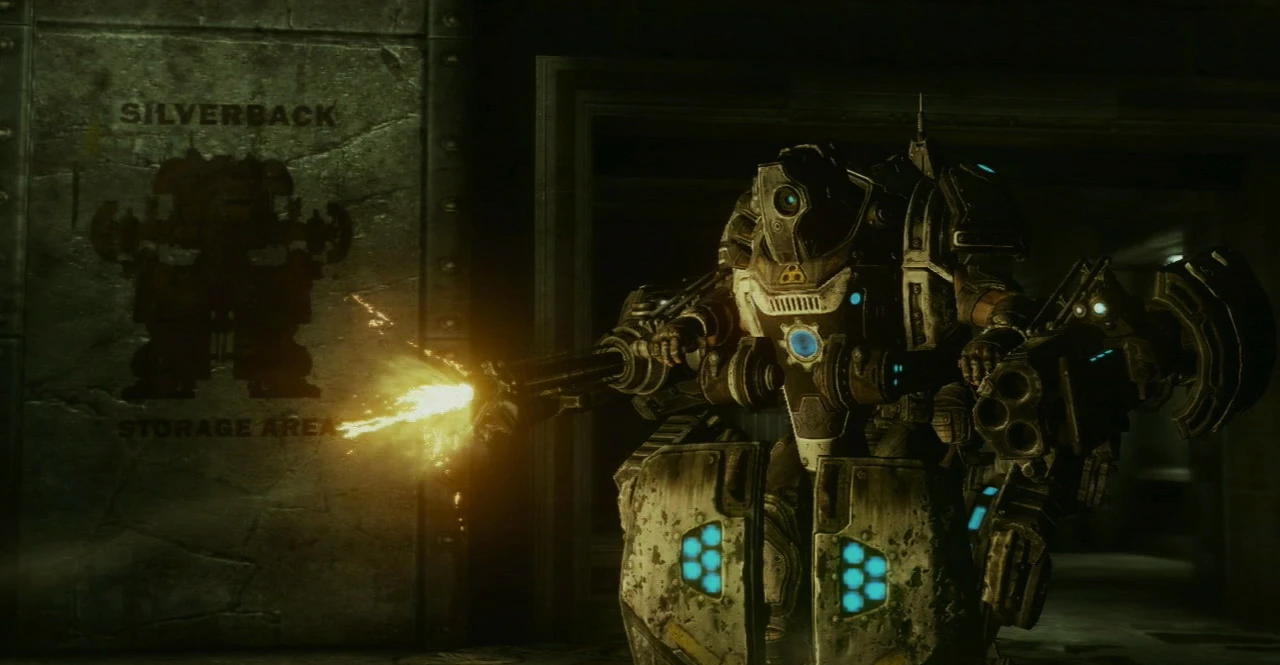
A Silverback at the Endeavor Naval Shipyard.
While looking for fuel for the CNV Adamant at the Endeavor Naval Shipyard, Delta moved into a dock area where the Locust had made a defensive position out of a cargo ship that was docked. After being spotted by two Queen's Guards, they came under attack from a unit of Guards and two Bloodmounts, not to mention Chain Gun and sniper fire from the ship. Jace pointed out a Silverback storage area and Marcus opened it up to find a Silverback inside. He used it to clear the Dock area and the Locust on the boat. After taking the boat, which had the fuel they needed on it, they came under attack by Reavers and Guards roping down from a Gas Barge, the Silverback was used again by Marcus to clear them out, using its machine gun and rocket launcher to deadly effect.[5]
Second Battle of Azura
- "If there's just four of you, try to find a Silverback. You'll need it, this place is heavily defended."
- —Adam Fenix, directing Delta to a Silverback
When they arrived on Azura, the first thing Delta needed to do was deactivate the Maelstrom shield. After fighting their way through the train station. Adam Fenix directed them through a service tunnel and told them to find a Silverback because the place was heavily defended. Marcus piloted the Silverback onto the Beach where the Grubs had really dug in. With the rest of Delta in tow, he fought past the defending force of Queen's Guards, Boomers and Reavers before coming to a trench leading to the main entrance. However, the Locust had blocked it and even the Silverback couldn't get through. Following that, a side entrance leading through to the train tunnel opened, revealing two Boomers. Marcus minced them with the Silverback's machine gun and Delta proceeded into the tunnel. After fighting their way through the tunnel, Adam directed them to a service elevator. There was a spare Silverback in a nearby storage vault accessed by a switch. After the lift was sabotaged by the Locust, Delta found themselves in blacked-out service tunnels full of Wretches. They fought their way through, killing the Flame Grenadiers and Queen's Guards too. Marcus had to leave the Silverback, however, as they need to climb ladders to get back onto the surface.[6]
Multiplayer
Gears of War 3

Beast
In Beast Mode, the Silverback is seen as an enemy to the players. Its minigun and rockets can be devastating to weaker units. It can prove to be a major nuisance to any player, so it's best to make it your priority target and destroy it quickly. Heavier units are recommended to deal with it, like the Berserker.
However, there are a few execptions to the Silverback. A Wretch's scream can instantly dislodge the Silverback pilot off, however because of their low durability the player must be extremely skilled and agile to do so. Explosive weaponry and attacking from the back can also dislodge the pilot, and it is best to destroy it since both Heros and standard units can use the Silverback.
Horde
In the Horde 2.0 mode, the mech is playable, but has to be built for a large sum of money. It costs $12,500 to build and you need to be at Level 7 for Barriers before it becomes available. Be aware that keeping the Silverback up and running after every round can be quite costly. One who wishes to repair the Silverback will themselves be spending hundreds to thousands of dollars. For this reason, it is wise to hold back or stay off to the side and kill any enemies that pass by while any teammates go out and around, drawing attention. This will save the Silverback from succumbing to heavy amounts of damage. The DLC "Horde Command Pack," which was released November 1, 2011, added in the ability to fire rockets in stationary mode. Upgrade costs $10.000. It has infinite ammo and uses cool-down reloading rather than magazine reloading. While in stationary mode, players can take cover behind the Silverback using its armor as protection. The Silverback has a stomp attack that can gib a Serapede instantly when stepping on any segment more than three segments back from the head. The stomp attack is also very formidable against enemies that move into close range. The Silverback will lean back and kick small enemies (Tickers, Wretches, etc.) squarely in the torso, killing them.
Gallery
")
")
")
")
")
Behind the Scenes

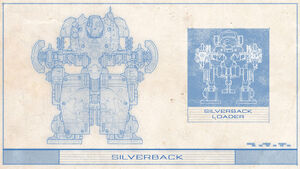
A blueprint of the Silverback.
- The CL8-330 Load Cells from a Silverback can be used to repair JACK units because, in Baird's words, "It's not like we use 'em for loading cargo anymore."[7]
- The Silverback may be based off the Buckethead, a deleted concept of a mech for the first Gears Of War game.[citation needed]
- In the map Rustlung, from the Horde Command Pack, a Silverback can be found in the torpedo bay. You will hear a loudspeaker say "Silverback Stage 1 Complete" when the Silverback is ready to be deployed, which will take approximately 4 to 5 minutes. It takes some time for the Silverback to rise at the bay once you activate the switch, but once it's on the battlefield, it is a force to be reckoned with. There is also a glitch that can be performed with this map's Silverback that can clone multiple copies for interesting results and game modes (Silverback sumo tournament). When activating it, you must kill yourself with a thrown bolo frag or have a friend gib you while still in the animation. As long as the Silverback activation animation is not completed, infinite Silverbacks can be spawned as long as the player activating the spawn station each time is killed before completing the animation cycle of turning the panel.
- It can be used by both COG and Locust factions, where the lights glow red when controlled by the latter.
- The Silverback is destructible. You can also momentarily deactivate it, if in enemy hands, by tossing a smoke grenade near it, which also forces the operator out too, stunned.
- In Act I of Gears of War 3, there is a Silverback manual collectible. It is located in the Silverback maintenance bay, on a work bench.
References
- ↑ Gears of War 3 Collectible - Silverback Manual
- ↑ Observations of Silverbacks in operation
- ↑ RAAM's Shadow: Under the Shadow
- ↑ Gears of War 3: Act I: Abandon Ship
- ↑ Gears of War 3: Act IV: Bon Voyage
- ↑ Gears of War 3: Act V: Home Away From Home
- ↑ Gears of War 3 Collectible - Requisition Form