|
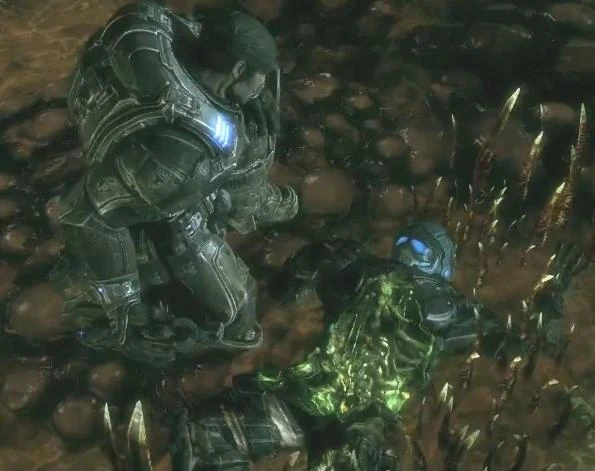
"Sarge?...I hurt."
|
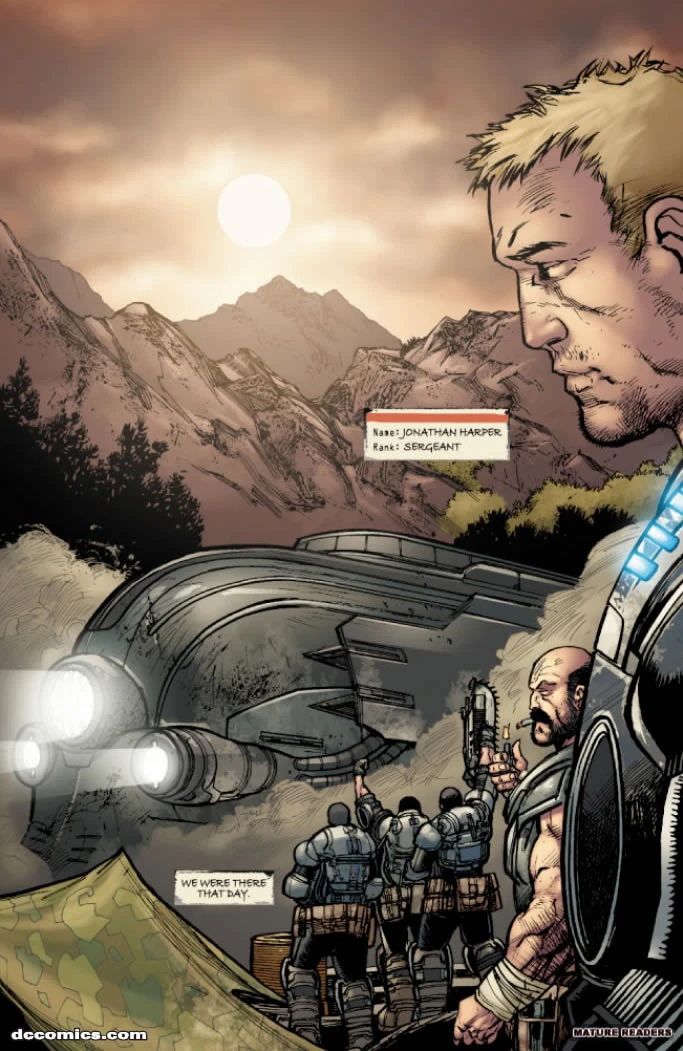
- "We were there at ground zero. All of us at Timgad, we saw the Lightmass bomb. It was something you never forget... hard to even describe. Another Gear, he said it was like seeing God screaming at creation. Bout as best as you could say it."
- —Sgt. Jonathan Harper after the bombing
The Lightmass Offensive, also known as the Lightmass Bombing or Timgad bombing, was a COG operation to destroy a significant proportion of Locust forces in hoping to end the war once and for all. Taking place in Ephyra city, Lethia Imulsion Facility, and the Outer Hollow, the objective of the mission was to deploy the Lightmass Bomb. It was hoped that this would destroy the Locust Horde and end the 14 years of war. The operation was to be carried out in two phases; the deployment of the Sonic Resonator to map the tunnels and provide targeting data for the bomb, and the actual delivery and detonation of the bomb itself.
Order of Battle
Echo-6 watch as Tyro Pillar leaves.
Opening shots
In the opening shots of the Lightmass offensive, Alpha Squad and along other squads was taking heavy casualties and running into heavy resistance from entrenched Locust forces in the city of Ephyra. While Alpha and Sgt.Kennel’s squad were dealing with the Locust Horde, Col.Victor Hoffman was on his own mission.
The Slab
Since the fall of Ephyra and Landown Locust forces were scattered around the Plateau and with the great loss of human life in the 14 years of war, Colonel Hoffman was forced to get fresh new recruits from the infirm, the young, and the irredeemable. Hoffman pardoned numerous criminals of all different kinds, but left Marcus Fenix to the Locust that were storming 'The Slab' (Jacinto Maximum Security Prison). Lucky for Marcus, Dominic Santiago had come to rescue him from the prison and the Locust Horde, and enrolled him in Delta Squad.
Resonator
Coalition forces took heavily losses during the opening hours of the offensive.
Delta Squad was personally ordered by Hoffman to relocate the Resonator and give support to Alpha Squad. Delta Squad then moved on the House of Sovereigns, the last known location of Alpha. Delta proceeded to eliminate several Locust hard points on the road to the House of Sovereigns, however during one fight Pvt.Anthony Carmine was killed by a Locust sniper. Regardless of the casualty Delta advanced into the House, where they came across Pvt.Augustus Cole, and moved on to take out the Seeders that were blocking communication with High Command. Alpha Squad and the Resonator were recovered; however the King Raven that was coming to extract the squads was shot down in an ambush by a horde of Drones led personally by General RAAM. Lt.Minh Young Kim and several Gears were lost in the attack and the subsequent arrival of the Berserker. The Berserker was killed by Fenix with the Hammer of Dawn and Fenix was promoted to Sergeant to replace Kim as leader of Delta Squad which was now made up of Sergeant Marcus Fenix, Private Dominic Santiago and the two survivors of Alpha Squad, Privates Augustus Cole and Damon Baird.
The road to Lethia
A newly promoted Sergeant Fenix was charged to lead Delta Squad, now consisting of Fenix, Santiago, Baird and Cole to the Lethia Imulsion Facility and activate the Resonator to map the Hollow. As it would be dark and the Kryll would then come out, it would be too dangerous to travel the 10 kilometer distance on foot. However, Private Dominic Santiago had a friend among the nearby Stranded named Franklin Tsoko who owned a Junker and owed him a favor. Traveling to the Stranded outpost, Delta encountered heavy Locust opposition, but managed to push through it to the outpost where Franklin reluctantly agreed to let them borrow his Junker and sent Dom and Marcus to Aspho Gas Station where it was located while Baird and Cole had to remain behind to help defend the outpost. Making their way to the gas station, Marcus and Dom were forced to stay in the light for protection, blowing up several propane canisters to do so after the Kryll came out. The first Stranded checkpoint was destroyed by the Kryll once they lost their light and the men manning it were killed. Finally, after more heavy opposition including snipers and Troikas, Dom and Marcus made it to the gas station only to find that Chaps, the Stranded manning it hadn't filled the Junker up with Imulsion as he didn't believe they'd make it. As the Junker was filled, the two Gears and the Stranded were forced to defend the station from a massive Locust attack. Once it was repelled, they fled in the Junker, running over a Boomer and causing it to accidentally blow up the station. After fighting off Kryll all the way back to the Stranded outpost, Dom and Marcus were forced to help the Stranded fight off a massive attack on the outpost by a variety of Locust forces. Once the attack was repelled, Delta left in the Junker and made it to the outskirts of the Imulsion Facility without further issues but the Junker broke down once they got there and they couldn't fix it without new parts and they abandoned it.
The facility
Arriving at the facility, Delta found Lambent Wretches along with the other types of Locust present. As the pumping station lift was off-line, they couldn't make their way directly to where they had to deploy the Sonic Resonator and would have to fight their way through the facility to the mines and then the Outer Hollow to get to the station. After having to find an alternate way into the facility as the front door was locked too tightly for them to enter, they found themselves facing several packs of Lambent Wretches and Locust. With the help of a Stranded who was killed by Lambent Wretches, Delta found their way to the mine carts and were able to get close to the mines, using lift platforms to get down into them after killing two Boomers.
The Outer Hollows
Needing to protect the Resonator, Delta split into two teams: Dom and Marcus went ahead while Cole and Baird stayed behind to protect the Resonator. After Marcus and Dom fell down a hole, Baird and Cole were forced to start searching for their own way to the Lethia Imulsion Facility's pumping station where they were to deploy the Resonator. Fighting their way through the Hollow, Dom and Marcus encountered all kinds of Locust and more packs of Lambent Wretches, but managed to push through them getting close to the pumping station before finding that a Corpser was stalking them. Marcus and Dom managed to drop the Corpser into a pool of Imulsion, killing it and reunited with the rest of Delta Squad. Reaching the pumping station, they found it heavily protected by a variety of Locust including Theron Guards. Attacking from both sides, Delta managed to take out the Locust and deploy the Resonator, using the pumping station lift to reach the surface once more. As Delta fled the Lethia Imulsion Facility, the Resonator detonated. As Delta believed that they had succeeded in getting the data needed to launch the Lightmass Bomb, they learned that the Resonator had failed as the Hollow was just too large. Baird found map data on the Hollow on a geobot he had picked up along the way and suggested they use that data instead. Studying the geobot data, Lieutenant Anya Stroud determined that the portion the geobot showed alone was more than the Resonator had gotten and determined that the location all of the data was stored at was the East Barricade Academy, more specifically the Fenix Estate. Needing the data, Colonel Hoffman redirected Delta to East Barricade to retrieve Adam Fenix's data. Unknown to everyone, General RAAM overheard the whole conversation on a captured Gear's radio and diverted forces to stop Delta from succeeding.
East Barricade
As Delta headed to East Barricade Academy on a King Raven to get Adam Fenix's data on the Hollow, KR Two-Five was shot down by Nemacysts and Delta was forced to land under heavy fire in a plaza and continue on foot from there. After eliminating all the Locust in the plaza, Delta split up to continue, taking out the Seeder who had shot down KR Two-Five with the Hammer of Dawn. Fighting through heavy Locust resistance determined to keep them from getting to the Fenix Estate, Delta eventually reunited near the downed King Raven and kept Stranded scavengers from taking supplies from the crash site. Securing the site, Cole and Baird remained behind to wait for the injured crew and Gears to be rescued while Marcus and Dom continued on to the Fenix Estate. Dom and Marcus kept fighting through the Locust to reach the Fenix Estate, killing a Berserker with the Hammer of Dawn along the way. Finally, after heavy resistance, the two reached the steps to the Estate and had to fight through entrenched Locust to reach the house itself which they learned from Lieutenant Anya Stroud had Locust tunnels inside and was thus infested with Locust. Reuniting with Cole and Baird outside the house, Marcus and Dom learned that there was a non-working APC in the back of the house that they could use for a quick escape if Baird could fix it. Assigning Baird to do that, Marcus and Dom assaulted the house itself, fighting through Locust forces to the basement. Finally locating the door to Adam Fenix's secret laboratory in the basement, Marcus and Dom were forced to hold off more Locust forces as JACK cut through the door to the lab. Finally, all the Locust attacking the basement were dead and the two members of Delta Squad and JACK were able to enter the lab where they found the tunnel data. Anya determined from it to her shock that the Hollow was a honeycomb and more spread out than anticipated but that the data was more than enough for the Lightmass Bomb. As there was too much data for Anya to download remotely, Marcus ordered JACK to download the data directly to his systems so they could just take it with them. As it would take time, Delta would have to defend the house from Locust attack. Fighting their way back to the second floor of the main room, Marcus and Dom met up with Baird and Cole who had successfully repaired the APC. Baird and Cole left to defend the APC while Marcus and Dom had to fight off a massive frontal assault on the house. Finally repelling it, Marcus and Dom were called to the back of the house where the Locust were attacking as well. After fighting through to the outside, they received word from Anya that JACK had managed to download all the data and Delta made a quick getaway in the APC, narrowly escaping a Brumak.
East Timgad
- "Man you sounded just like your old man back there.
Yeah well screw my old man. He thought he could prevent this war and look what happened!
Yeah, well his mapping data will help end it." - —Dom Santiago and Marcus Fenix.[12]
After a fast escape from a Brumak, Delta runs into the Timgad bridge only to find the draw bridge open. Delta spits up to find a way to get power on by entering Nassar Memorial Park, only to find the power lines are being diverted from the Bridge. After being chased by the Brumak across East Timgad, they get a distress call from Anya that the Train commander is under attack, but Seeder jams kick in and Delta is cut off. After finding the Location of Timgad Central Energy, Delta discovers that the Stranded are not stealing power from the Plant but in fact the Locust are sending power back into the Hollows and the Train has been overrun and all survivors are thrown in front of the train.
Lightmass bomb
Delta Squad quickly moved to Timgad Station, fighting off Locust troops and boarding the Tyro Pillar. Unfortunately Cole and Baird were unable to get on the train. They were forced to wait for pickup from a King Raven. Marcus and Dom faced heavy opposition from another Berserker, Lambent Wretchs, and Reavers, fighting their way to the first car and finding the remains of the Gears that were guarding the Lightmass bomb. Here they encountered General RAAM, and with the help of a King Raven, were able to kill the Locust General and load the data onto the Lightmass bomb. Dom and Marcus safely got onto the King Raven and watched the Lightmass bomb drop into a lake of Imulsion. The bomb was able to destroy the Locust living in the Outer Hollows and the Kryll breeding grounds.
Aftermath

The collapsing mountains from the Lightmass Offensive.
COG Premature Victory
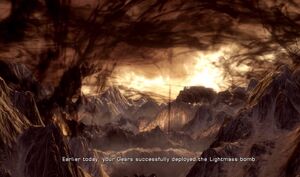
- "Earlier today, your Gears successfully deployed the Lightmass bomb. We have destroyed the enemy stronghold. This war has exacted a heavy price from all of us, it has torn our world apart. But you have my word: we will rise again."
- —Col. Hoffman's victory speech
With the success of the Lightmass bombing, Coalition High Command was able to order repairs and allow many of their Gears to rest, since Locust incursions in the aftermath of the attack were low in numbers and strength. The bomb destroyed the Kryll breeding grounds and 99.9% of their population. The Eagle Newspaper reported that the COG recaptured Ephyra[13], where the Stranded were allowed to roam free in city both day and night.[14]
However, the vaporized Imulsion led to Rust Lung in people who inhaled it.
The Horde Rebuilds
- "They do not understand. They do not know why we wage this war. Why we cannot stop. Will not stop. Why we will fight and fight and fight. Until we win... Or we die. And we are not dead yet."
- —The Locust Queen on why they never will give up.
Until the Sinking of Tollen and Montevado, the COG High Command did not realize that the Horde was still organized. The Lightmass bomb awakened the Riftworm, a creature the Locust revered as a deity. From the time after the Lightmass offensive, the Locust attacked North Gate Agricultural Depot and Jilane. Kantus High Priest Skorge would use the Riftworm to destroy several COG outposts and three cities, leading to Operation: Hollow Storm.[15]
References
- ↑ Gears of War 2
- ↑ Gears of War 2
- ↑ 3.0 3.1 Gears of War 2
- ↑ Gears of War:PC
- ↑ Last Day
- ↑ Gears of War
- ↑ Gears of War:Harper's Story
- ↑ Last Day Tab 10
- ↑ GoW 1 Act 1
- ↑ GoW 1Act 2
- ↑ Gears of War
- ↑ Gears of War PC: Act 5: Chapter 1: Impasse
- ↑ Gears of War 2 collection http://www.flickr.com/photos/chrisbartlett/3019591574/in/set-72157608811929784/
- ↑ Gears of War: Aspho Fields
- ↑ Beneath the Surface: An Inside Look at Gears of War 2