No edit summary Tag: sourceedit |
Tags: Visual edit apiedit |
||
| Line 52: | Line 52: | ||
Bloodmounts are playable units in the second tier of [[Beast]] mode in [[Gears of War 3]] for $750. They are fast moving units, and are effective at destroying barriers and other constructions. |
Bloodmounts are playable units in the second tier of [[Beast]] mode in [[Gears of War 3]] for $750. They are fast moving units, and are effective at destroying barriers and other constructions. |
||
| − | The Bloodmount is controlled by the player, however, the Drone riding it is AI controlled and armed with a [[Hammerburst II|Hammerburst]] which it will fire at any COG soldiers within range. However, the rider will be distracted by Decoys, and may fire at them instead. The Bloodmount has access to a fast claw attack, and can easily jump over cover. |
+ | The Bloodmount is controlled by the player, however, the Drone riding it is AI controlled and armed with a [[Hammerburst II|Hammerburst]] which it will fire at any COG soldiers within range. However, the rider will be distracted by Decoys, and may fire at them instead. The Bloodmount has access to a fast claw attack, and can easily jump over cover. Once all is said and done, Bloodmounts are one of the deadliest creatures in Beast Mode, only beaten by the Berserker. |
==See Also== |
==See Also== |
||
Revision as of 21:24, 26 August 2015
- "Bloodmounts!"
- —A Gear warning his/her squadmates of Bloodmounts
The Bloodmount was a Hollow creature that the Locust Horde rode atop. They are large, bulky creatures that remain low to the ground. They have a unique physiology in that they use their large muscular arms as legs, essentially walking on their hands. Their true legs dangle beneath their bodies and end in razor sharp talons, which they use as their primary form of attack. They were known to the COG Army before the Mission to Montevado.[2]
History
Destruction of Halvo Bay
Several Bloodmounts attacked Kilo Squad all throughout Seahorse Hills while they searched for Professor Kurt Elliot's mansion to get the launch codes for the Lightmass Missile.
Some Bloodmounts attempted to stop Kilo from deploying the Missile at the Museum of Military Glory and were part of the Locust force that attacked them once the missile was deployed.
More Bloodmounts managed to enter the courthouse Kilo Squad was being held in and attacked the Gears at several halls and rooms inside the courthouse but they were able to overcome their attackers and escape.
Evacuation of Ilima
- "Shit, they brought the cavalry!"
- — Michael Barrick after he spots some Bloodmounts approaching their position
Bloodmounts took part in the assault led by General RAAM to stop the evacuation of Ilima City. Zeta-Six first encountered two Bloodmounts that attacked them as they tried to enter Ilima Trusts and Savings. Another pair of Bloodmounts ambushed Zeta as they passed through an alley full of Locust. Two more Bloodmounts, this time with Theron Sentinels as their riders, blocked Zeta's way as they tried to get past a construction site just as the Kryllstorm was about to arrive.
Montevado
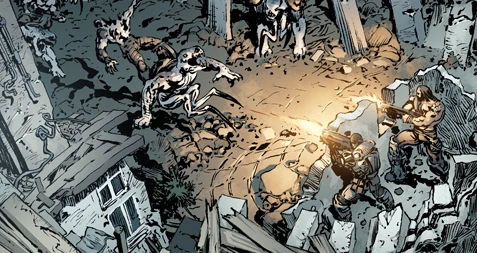
Bloodmounts attacking Michael Barrick and Marcus Fenix.
When the Riftworm destroyed the city of Montevado, both Wretches and Bloodmounts were sent to clear the city of any human survivors. Delta-One battled a horde of Bloodmounts and Michael Barrick sacrificed himself to save Marcus Fenix by charging several Bloodmounts in hand to hand combat, taking out several of the Bloodmounts along with their Beast Riders.[2]
Hollow Storm
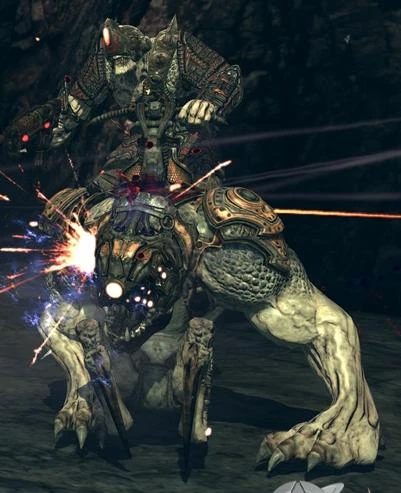
A Bloodmount and its Beast Rider under attack.
- "They got Bloomounts down here! Watch their reach!"
- —Marcus warning his squad in the Ilima sink-hole
During Operation: Hollow Storm, when the city of Ilima was destroyed by the Riftworm, the Locust sent death squads consisting of Bloodmounts, Drones, Snipers and a few Kantus. But all the Locust forces were killed by the Gears of Delta-One. The regrouped Delta-One attacked the Locust processing center after rescuing Baird. Bloodmounts were sent in along with ground forces, but all were killed at the hands of the Gears.
Another Bloodmount tried to give assistance to the Locust Gunboats but fell at the hands of Marcus and Dom, who had both returned to the Hollow to activate JACK's targeting beacon so that more Gears could land inside the Hollow. When the pair goes to find Maria, they encounter a few Bloodmounts along with Drones, Boomers, Therons and Kantus. When the Palace was attacked by Delta during the second wave attack on the Hollows and the Nexus Stronghold, Locust Palace guards rode atop the Bloodmounts in a last ditch effort to save the Palace from the COG forces. Delta also encountered the Bloodmount Stables, which were full of beheaded human corpses: the Bloodmounts' food. The Bloodmounts inside tried to attack the Gears through the bars but were unable to harm the humans.
During the Siege of Jacinto, two more Bloodmounts confronted Dom and Marcus outside of the Archives Building on their way towards the sinkhole. They used a Troika nearby to deal with them.
After the Flood
A single Bloodmount and its rider escaped the flooding of the Hollows and headed towards the city of Port Farrall, where the survivors of Jacinto were located, along with a small Locust party. Dominic Santiago and Marcus Fenix were able to spot the Locust and called for reinforcements. The Bloodmount and its rider tried to counterattack but the beast was killed by a single shot from Centaur Twenty-Eight's main cannon while its rider died a few minutes later.
Lambent Pandemic
Bloodmounts were first re-encountered during the Battle of Anvil Gate where several of them passed through the main gates, after a Siegebeast destroyed the front doors, before being destroyed by Gears wielding Vulcan Cannons. The next day, as the Gears tried to reach the city of Mercy, several Bloodmounts attacked their Rat Truck while they were stuck in a sandtrap but were torn apart by Vulcan Cannons yet again. They encountered the Gears again at the Endeavour Naval Shipyard while searching for fuel and a rotor to repair the CNV Adamant. They were taken down by a Hammer of Dawn targeting laser inside the dockyards. At Azura, they attempted to stop them from taking down the Siegebeasts at Acanthus Train Station but didn't succeed. They later attempted to stop Delta from reaching Pinnacle Tower but failed to do so. At the tower itself, they tried to stop Delta from reaching the elevators that led to the top floor but were slain by them.
It remains unknown if the Bloodmounts survived the Imulsion Countermeasure Weapon.
Multiplayer
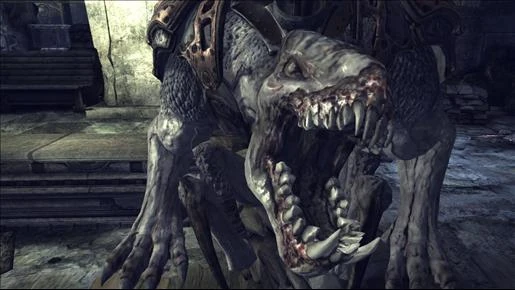
A Bloodmount unmasked.
Bloodmounts are playable units in the second tier of Beast mode in Gears of War 3 for $750. They are fast moving units, and are effective at destroying barriers and other constructions.
The Bloodmount is controlled by the player, however, the Drone riding it is AI controlled and armed with a Hammerburst which it will fire at any COG soldiers within range. However, the rider will be distracted by Decoys, and may fire at them instead. The Bloodmount has access to a fast claw attack, and can easily jump over cover. Once all is said and done, Bloodmounts are one of the deadliest creatures in Beast Mode, only beaten by the Berserker.